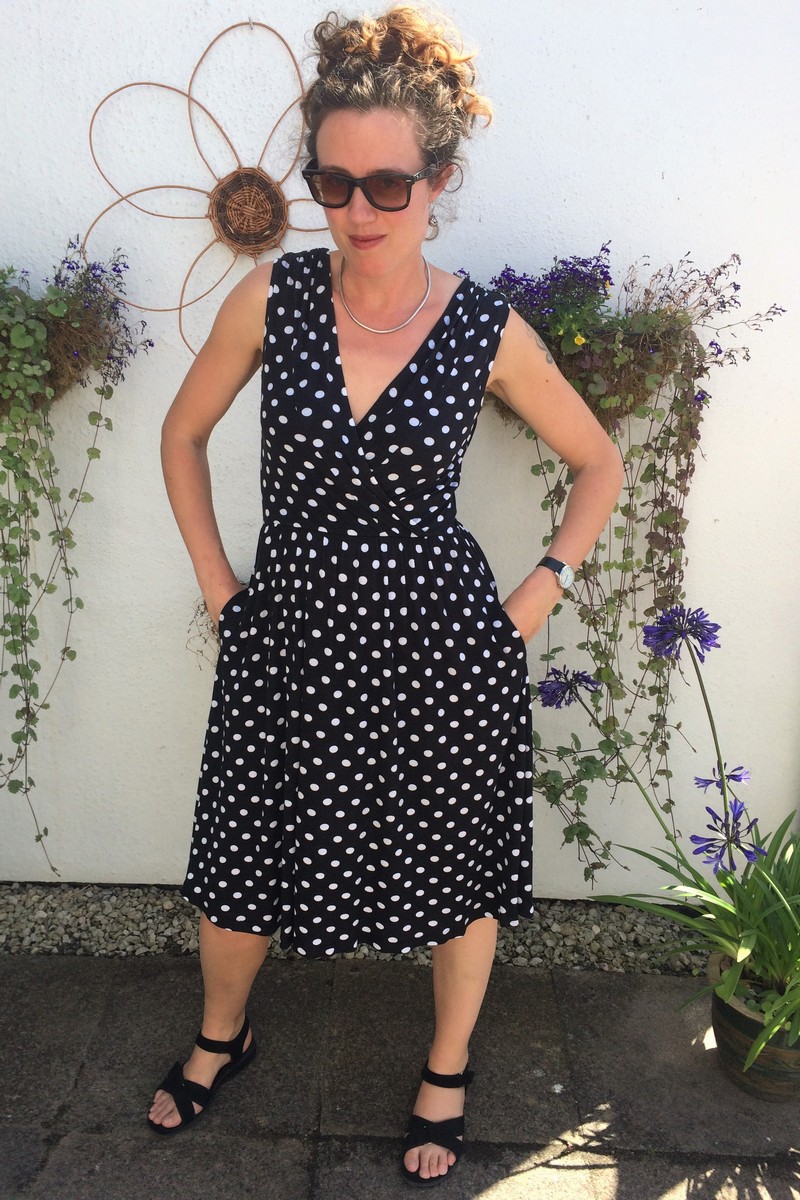
My wardrobe was in serious need of a really lightweight sleeveless knit dress for the summer (and autumn/spring when teamed up with cardie and leggings), so this project jumped all queues and demanded in no uncertain terms that I MAKE IT NOW!!! And you know what? I wish I’d made it earlier in the year to get even more use out of it. What a perfect dress!
 NB: the title comes from the extra verse to Sing a Song of Sixpence which I found in a nursery rhyme book for my daughter, which goes like this:
She made such a commotion that Little Jenny Wren
Flew down into the garden and put it back again.
I’m not sure if this is a modern addition because someone feared small children would be traumatised by the idea of the maid having no nose (I never was!), but I thought of it while making this dress as I was effectively giving myself back a favourite dress that’s now too big. So yeah, Little Jenny Wren put it back for me. Although it’s not a nose. It’s a dress. Because having a nose in my wardrobe would just be weird 😛
In a Nutshell:
A retro-looking, super comfy and practical summer dress with pockets. What more could a girl ask for?!
Pattern:
The Colette Wren dress. It’s a simple knit dress with a surplice bodice, two skirt options and a choice of sleeveless or short sleeves. I’ve had my eye on this one ever since it came out, but always wanted to make the fitted skirt version. However, when it came down to it I thought the full skirt would be more airy for a summer dress. I made a straight size Medium, based on my measurements, which usually seems to fit me pretty well with Colette patterns.
Fabric:
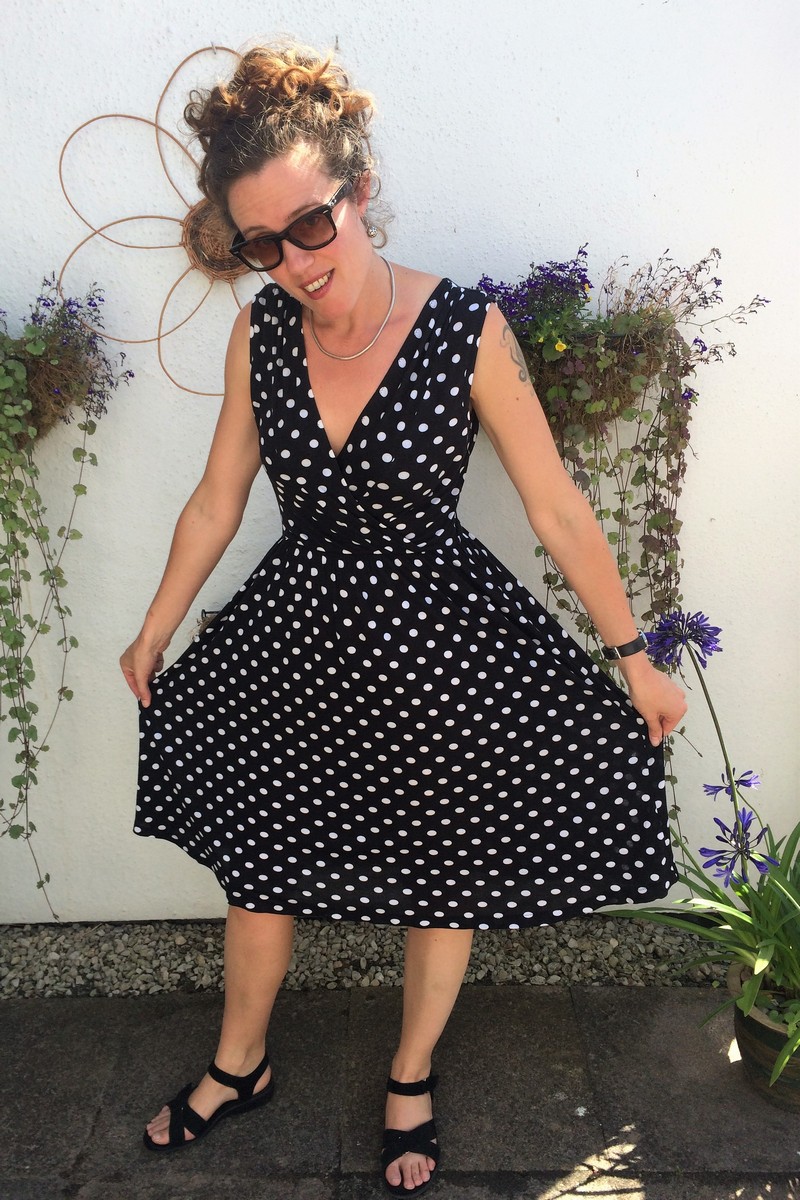
It’s a cotton/rayon jersey from Girl Charlee UK, with some nice BIG polka dots. I’ve been looking for a quality, soft and lightweight black and white polka dot knit to recreate one of my favourite (and now too big) dresses, and I think I might have found it here. Obviously the dots are much bigger, but I think that’s a good thing. I’m all about the bold patterns these days. Go big or go home is my motto from now on.
Changes I made:
- I omitted the pointless back seam in the skirt by cutting it on the fold instead of as two pieces. In actual fact, I just used the front skirt twice as it’s exactly the same pattern piece on the fold. I think the only reason the back is done like this is to reduce fabric wastage for the larger sizes, meaning curvy gals can buy less yardage.
- Added the in-seam pockets from the Moneta dress.
- Finished the armholes with bands rather than simply turning and stitching (more about this in a moment)
Construction:
This is a pretty straightforward knit dress and there were no big surprises in construction. I did change a couple of ways of doing things to my preferences, though. First up I added clear elastic to the shoulder seams (the pattern instructions don’t tell you to do this so I thought I was being clever), but then realised that this was a big mistake as the ends of the elastic show at the neckline. I won’t be doing that again, unless I go ahead with putting a band around the neckline to cover the end of that seam (more on this later).
I then didn’t use clear elastic where the pattern told me to, which was to shirr the waist of the skirt. Don’t worry, though. I used regular elastic instead. I just had such a nightmare with clear elastic shirring with my Moneta dress I vowed to use normal elastic in future, and it’s worked fine. It has considerably more stretch than clear elastic so it’s much easier to work with.
As my knit fabric was so thin and drapey, I did have to stabilise it with knit interfacing at the hem and neckline or my zig zag puckered like crazy. I also interfaced the banding I added at the armholes.
The armholes. Oh God, let me talk about the armholes! These were HUGE!!! Massive gaping at the front, and let’s face it, I’m probably a bit smaller than the bust size Colette drafts for (I think I’m really between a B and C cup) so it wasn’t that an FBA was needed. I expect they would have been fine if I was adding the sleeves, but they were pretty useless for a sleeveless garment. If I make this dress again I will definitely redraft the armholes, and I might try working from a size S at the top as I know I have pretty narrow shoulders and upper torso, so that might be a better size for me there.
In the end I pretty much fixed the armhole issue by making bands that were considerably smaller than the armhole, and then easing the excess bodice fabric in (I made sure to ease the most in at the front as that’s where the problem was). It took me a couple of goes to get it right and I’m glad I basted to check the fit as it’s nowhere near as tedious to unpick basting stitches as overlocked seams #askmehowiknow
But I have to admit, I’m wondering if some of my issues with the armholes are down to the fabric, as it doesn’t have great recovery. It’s lovely to wear: light, drapey, comfortable, soft, etc, but it doesn’t spring back into shape if it gets stretched out. I found this out when wearing my finished dress for the second time, and realising that I was having a major wardrobe malfunction and flashing my bra at the world as the neckline had stretched. And this happened while I was on holiday so couldn’t exactly sit down at the sewing machine to sort it out. Luckily my cross body bag kept it pretty much in position when walking around 🙂
When I got home I had to unpick the neckline hem and sew it back again with clear elastic in the hem, stretched out to a full 2″ less than the length of the hem. It was a hassle and I hate unpicking my finished garments, but I’m pleased to say it’s worked really well and the dress is back in regular rotation. Yay for taking the time to fix things!
Time taken: 2 hours 44 minutes for the initial make, plus an extra half an hour or so to sort out the neckline gaping.
(time taken is the time to sew, which will include pinning, stitching, pressing, etc, but doesn’t include time spent planning, tracing patterns, cutting out fabric, setting up the sewing machine, puzzling out instructions, trying things on, etc. So in other words, it’s not actually the total time I’ve spent making something, but it’s a rough guide at any rate. Just don’t come complaining if it takes you longer to make something!)
Overall verdict:
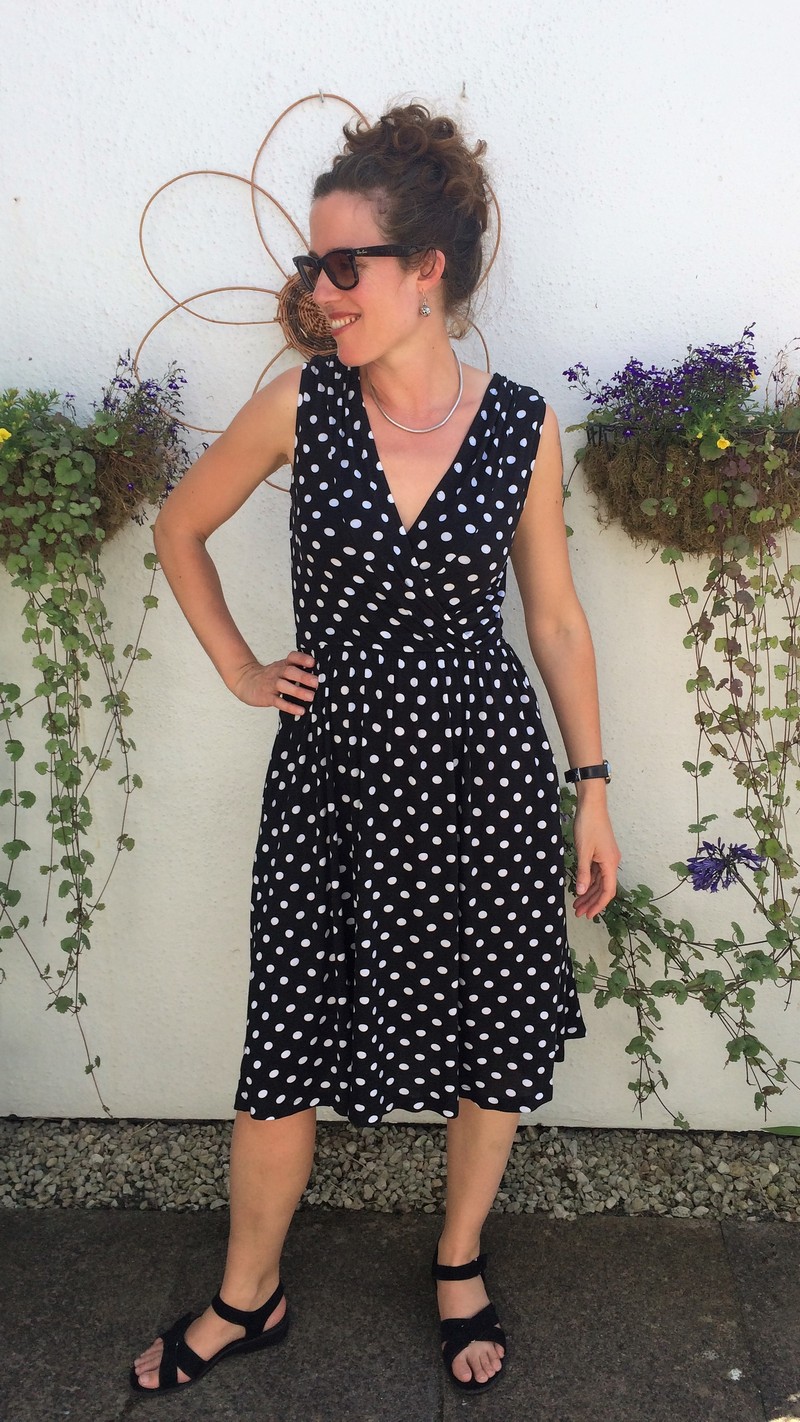
I absolutely bloody love this dress! It’s everything I was after in a summer dress. Cool and comfortable in the heat, covers up my shoulders, plunging neckline, etc. And the polka dots make it a classic. Andy loves it–he actually noticed it and asked if I was wearing a new dress, which is pretty unusual for him! My mum said it reminds her of something her great aunts would have worn, which I’m guessing I should take as a huge compliment seeing as how I’m working on creating a retro-inspired wardrobe 🙂
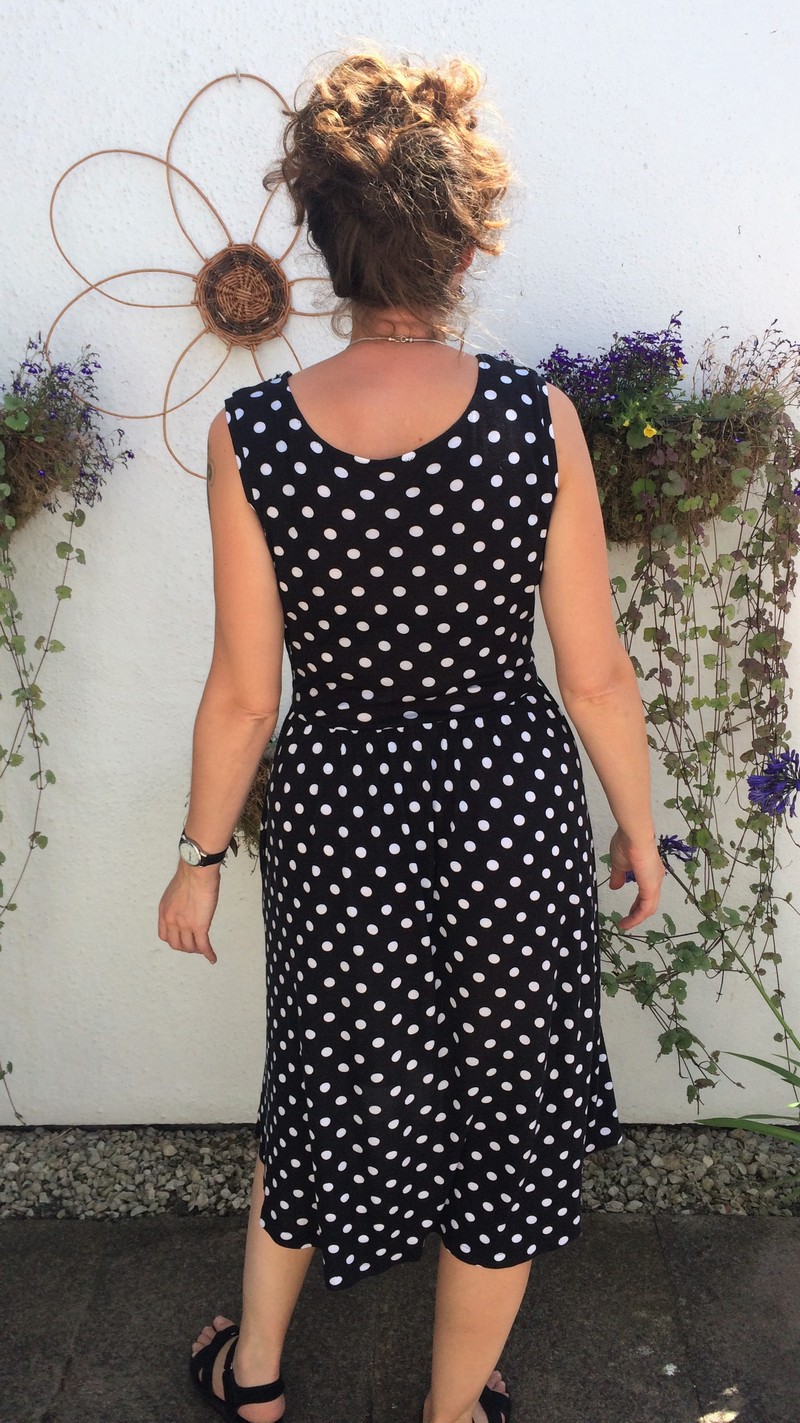
Here’s pics of it all the way round:
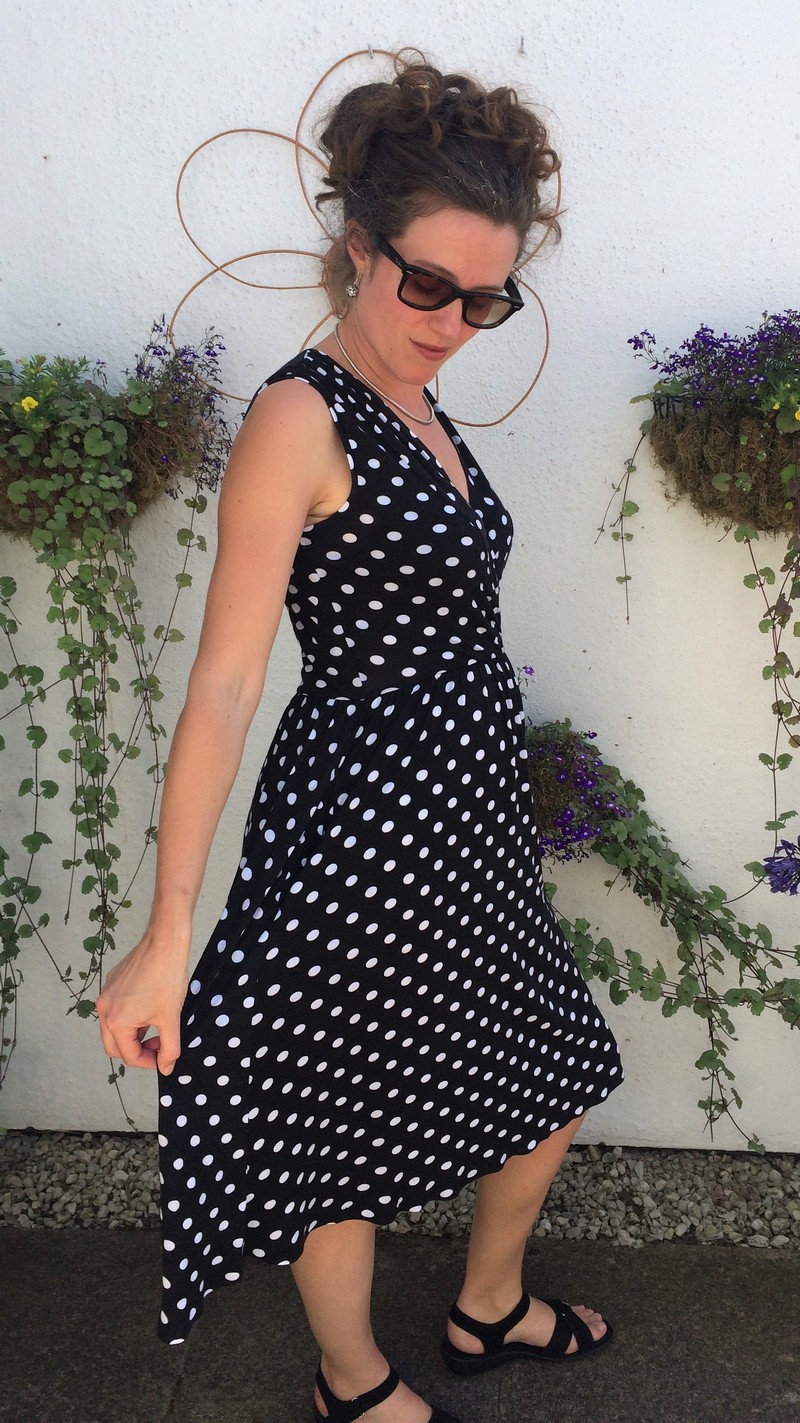
My only regret with this is that I didn’t stabilise the pockets better. When I put my phone in them it pulls the whole side of the dress down! Fine for a credit card or a lip balm, but I really wanted to fit my phone in there. Ah well. I’m sure I can figure something out for the next version…
Also, I can see from the back view I do need to make a swayback adjustment. Will do that next time.
Changes for next time:
I will definitely be making a Wren dress again, but it’s going to need a few tweaks to the pattern first. There’s that swayback adjustment for a start, and for another sleeveless version I’ll adjust the armsyce to make it smaller. I’m also seriously considering changing the bodice front, melding the two pattern pieces (bodice front and band) into one. I would rather have a much narrower knit band that wraps around the entire neckline, allowing me to stretch it while attaching to get a tighter fit. It would also look better by covering where the shoulder seams are, too. Whether this would still be a Wren dress after all those alterations is anyone’s guess, but I guess I’ve reached the point now (with knits, anyway) where I feel confident to make major adjustments. Maybe I should just go for it and create a knit sloper, so I can draft all my own tops and dresses from scratch… I’ve had my eye on this Patternmaking for Knits Craftsy class for a while now.
I think the trickiest thing about making another Wren will be finding the right fabric. You need something lightweight with lots of drape to make those wonderful shoulder gathers (which I only just managed to ease in, so a thicker fabric would be impossible), but those fabrics don’t always have great recovery. I’ll definitely be snapping up anything suitable I find in the right colour/pattern, though. I can totally see this dress in a tropical leaf print for next summer!
Costing:
Pattern: £13.45
3 Seamwork credits at a rough conversion of £7.35, plus £6.10 for printing (3 x A0 sheets)
Fabric: £15.92
£9.95 per metre (plus a 20% off discount). Used 2m.
Notions: £0.00
Knit interfacing, elastic and thread all from stash.
Total cost: £29.37
Okay, so this wasn’t my cheapest ever make. However, I have some serious love for this dress and I reckon I’ll wear it enough to get my money’s worth. Also, the cost-per-make will come down every time I reuse the pattern.
So, what do you reckon? Would you give this pattern a try? And do you hate picking apart your finished makes as much as I do?!
And I’ll be back next week with my latest hacci knit kimono, which has been getting a fair bit of wear this summer too. Ciao for now, peeps!
Disclaimer: some of the products linked above use affiliate links, meaning if you follow the link and make a purchase I will receive a small referral fee (at no added cost to you). Any extra income to help fund my sewing habit is greatly appreciated, but rest assured I only recommend products I love and think you might find useful too 🙂
