This is one of those projects that was so simple to sew it hardly seems to warrant a blog post of its own, but hey, it’s my blog and if I want to blog the super-easy makes as well as the complicated ones, I absolutely can. And I seriously love this skirt, so there’s that 😛
Also, I’ve been meaning to blog every week and clearly that didn’t happen last week. I’m not going to apologise because I don’t believe in feeling guilt for no good reason, but I felt like I owe an explanation. Life has been busy and time got away from me, plus I’ve been sewing rather than writing about it–oh, the pressure of an impending holiday deadline! You’ll get two blog posts from me this week, though, as I’ve got one scheduled to go live on the Sewcialists blog tomorrow. I’ll post a link here when it does 🙂
Anyway, on with the sewing stuff…
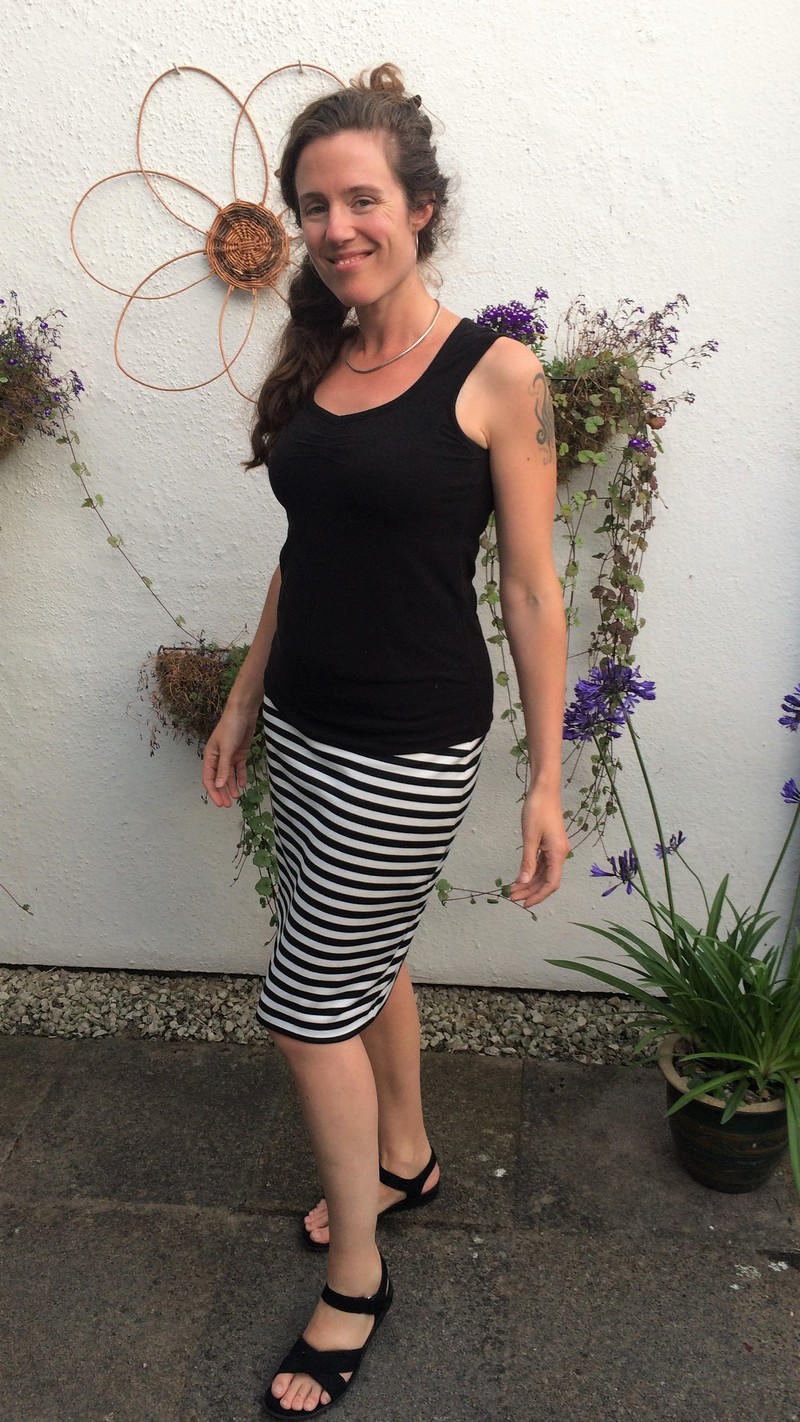
In a Nutshell:
A knit pencil skirt that fills a gap in my wardrobe I didn’t even realise was there!
Pattern:
It’s the Easy Knit Pencil Skirt from the Gertie Sews Vintage Casual book, which I’ve made once already this year.
Fabric:
This is the Black and White Small Stripe Ponte de Roma from Girl Charlee, who describe it as being: “thicker medium weight and has a nice stretch, slight 4 way stretch, excellent drape, and great recovery”. I can’t argue with any of that! This is probably the best ponte I’ve ever sewn with, and the high cotton content (40%) makes it nice to wear even in summer–feels great against your skin and isn’t sweaty. I originally bought it with the idea of making a maxi skirt, but although it has lovely drape I thought it was probably a little too beefy for that–I prefer a light, swishy fabric for a maxi skirt. Pencil skirt it was, then.
Changes I made:
- I did add about 6″ length to the skirt, but ended up chopping it all off again as it restricted my stride. Can’t be having that!
Construction:
This was such an easy make last time that I perhaps got a little blasé and didn’t take enough care with my cutting, because when it came time to sew the sides of the skirt together, could I get the stripes to match? No, I bloody well couldn’t! They were okay at the top of the skirt but went wonky by the bottom, particularly on one side. I scratched my head trying to figure out why. I was sure it wasn’t down to duff fabric. Girl Charlee fabrics are always good quality, and this had yarn dyed stripes so couldn’t possibly have been a printing error. I’d prewashed and dried flat so I didn’t think it was inadvertent fabric stretching, but decided to put the two cut skirt pieces into the wash again and dry even more carefully, just in case.
I did worry that I might have cut too close to the selvedge, where the fabric isn’t always even, but was relieved that the two skirt pieces came out of the wash with the stripes looking perfectly even all the way down (I checked with my big quilting ruler to make sure!). Hoping I’d solved my problem, I hung the skirt up to pin it as usual, but the stripes were still doing something funny on one side and were misaligned by a couple of millimetres by the bottom of the skirt. That might not sound much, but in a bold print like this it was seriously noticeable.
It was at this point that I lay my fabric down on the table and realised my problem. My two pieces were not the same shape. Doh! One of my side seams was almost a centimetre wider by the bottom, meaning that side of the skirt was a different length, throwing out the stripe alignment. I should have followed my own advice and traced my pattern piece doubled, rather than leaving it on the fold! Once I had the two pieces the same shape the stripes all lined up, and I felt like a real fool for not having considered “user error” as my problem all along. I mean, I might have been sewing for years, but that doesn’t mean I don’t sometimes make really simple mistakes. Ah well. Lesson learned. Note to future self: trace all knit pattern pieces flat rather than on the fold.
After that construction was all plain sailing, and the skirt went together really quickly using the overlocker, with a simple zig-zagged hem.
Time taken: forgot to time, but it wasn’t long. 30 mins, perhaps?
Overall verdict:
I can’t believe how much I love this skirt! It’s so comfortable, and the fabric is beautiful quality. Some ponte wants to bobble really easily, but I’ve worn this quite a few times already and it shows no sign of doing so. I hadn’t planned to have a striped pencil skirt in my wardrobe, but I’ve been wanting to wear it all the time and feel fabulous when I do, so it clearly was a much-needed item. Andy really likes it too and noticed the first time I wore it, which is saying something for him!
Obviously with such a bold print like this one the skirt doesn’t play so well with other prints or softer colours, so for the moment I’m pairing it with my few solid coloured tops. I’m hoping to find some prints that do go with bold stripes, but I’m wanting more solid colour tops in my wardrobe anyway, and have navy, black and red knit fabric ready and waiting 🙂
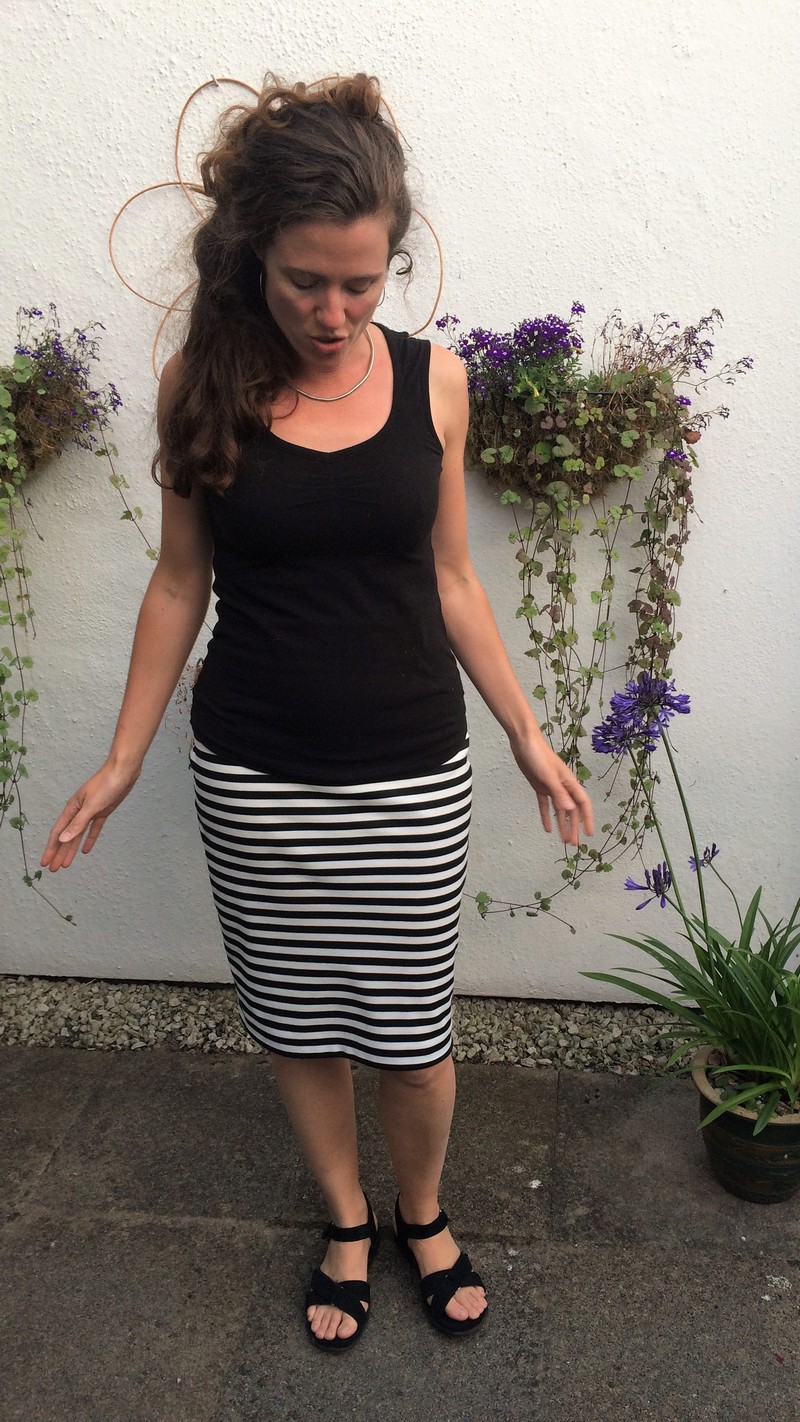
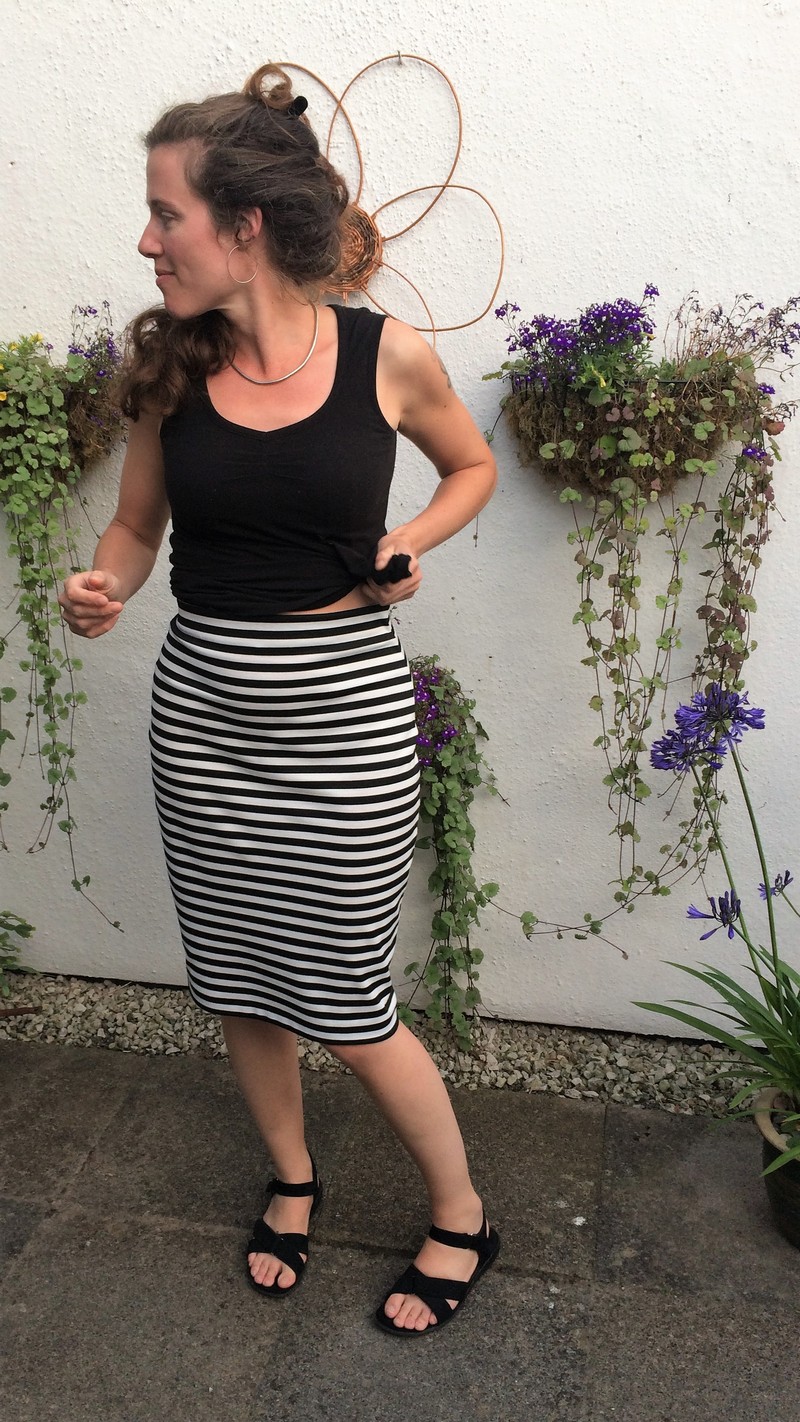
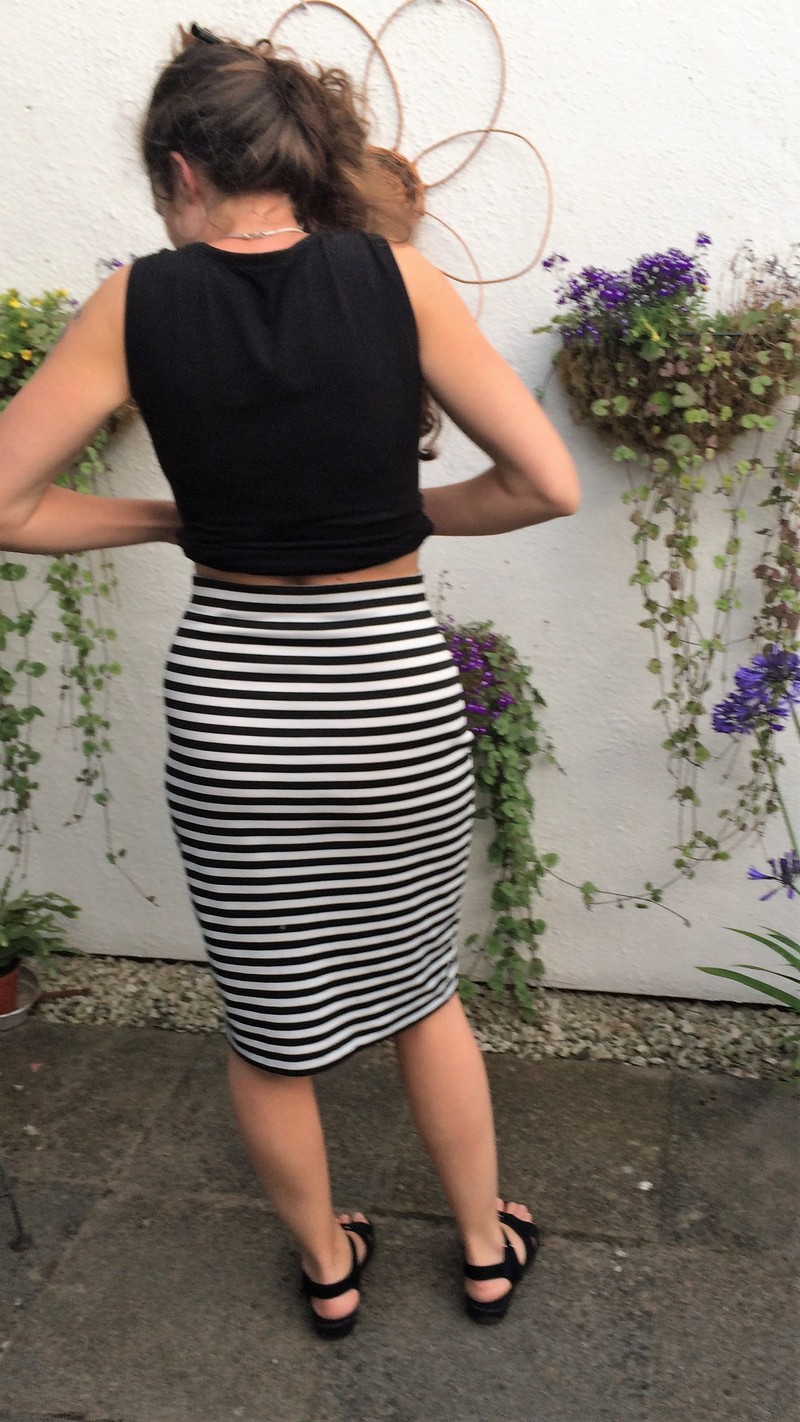
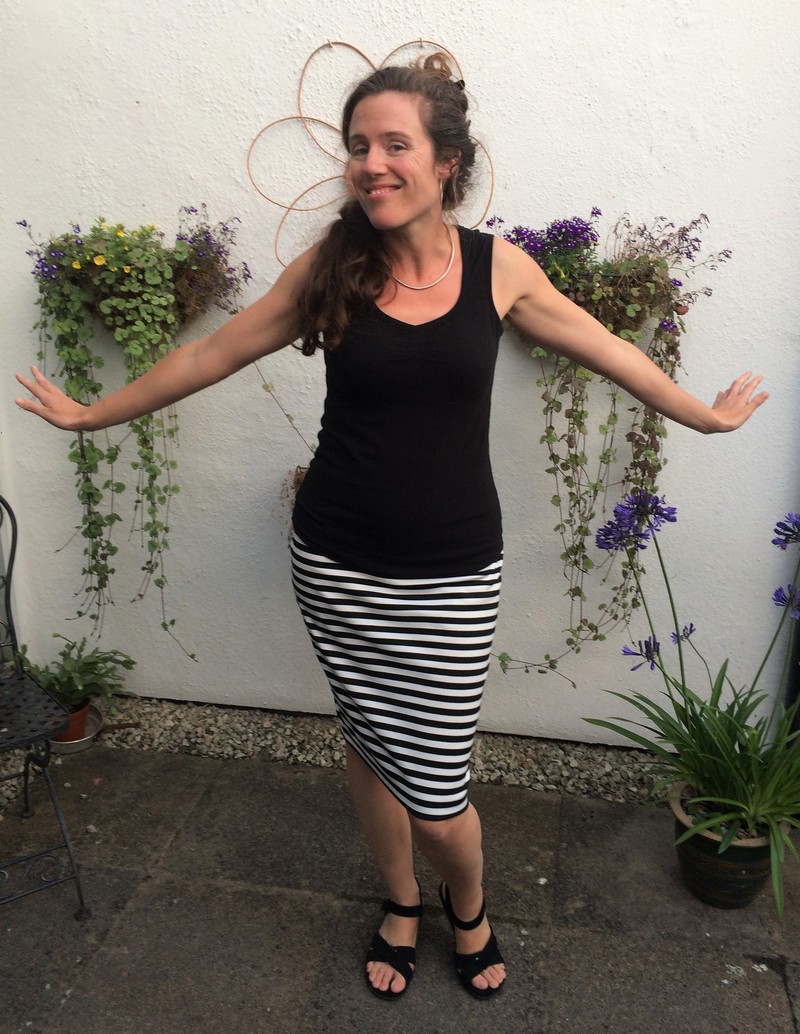
Here’s some pics showing the different views (spoiler: it’s exactly the same front and back!) and showing how high waisted it is. And it’s really high waisted. I should mention here the Prym waistband elastic. It’s designed to be on show and comes in loads of different colours, but I decided to go for concealed for a neater look. It is incredibly soft and stretchy elastic, though, so I know I’ll be buying it again for other projects as it’s exactly what I’m after for a waistband.
I’m wearing it here with another Gertie Sews Vintage Casual make, the Knit Sweetheart Top (I blogged this one here). These go so well together and are great wardrobe builders for a vintage-inspired capsule wardrobe 🙂
Changes for next time:
I’ll definitely be making this pattern again, and next time I want to try adding those six inches again for a midi length, making a back seam with a split to allow for actual walking with real, unladylike strides 😛
Costing:
Pattern: £0.88
Based on the book of ten patterns being £17.49 when I bought it, so £1.75 per pattern, and I’ve now used this one twice.
Fabric: £7.96
£9.95 per metre, but I bought it during a 20% sale. Used most of the metre for this as I originally cut it longer.
Notions: £1.73 for 0.8m Prym waistband elastic. I bought that from a local shop, but you can get the same stuff from Minerva here.
Total cost: £10.57
I’m happy with that, for a skirt I know I’m going to wear regularly until it falls to bits 🙂
One last pic for luck!
Right, I’ve been sewing up a storm this month in preparation for my holiday in France, so lots of lovely things will be making their way onto the blog over the next few weeks. But we’ll be going on holiday on Tuesday, so next week the only post you’ll see will be my usual monthly round-up and planning post. I’ll be taking pics of my new makes while away, though, so they’ll be ready for blogging in August. Prepare for beachy pics, possibly with added drama from the forest fires in the background. Oh yeah, we picked the right year for a trip to the Cote d’Azur *facepalm*
Anyone else not realise how much they needed a garment until they made it? And for those who blog, do you ever feel like some patterns are almost too simple to blog about?
Disclaimer: some of the products linked above use affiliate links, meaning if you follow the link and make a purchase I will receive a small referral fee (at no added cost to you). Any extra income to help fund my sewing habit is greatly appreciated, but rest assured I only recommend products I love and think you might find useful too 🙂

I’d love to see how you do the longer length with the split. Have been thinking I’d like to do that too but not being an experienced sewer, I look to people like yourself to lead the way with tutorials first!
The skirt in stripes looks fantastic by the way.
Thank you so much! When I try out the split I’ll make sure I take some pics and see about putting together a tutorial of sorts 🙂