Okay, you know the weather must be hotting up in England if I’ve made a pair of shorts. I mean, I haven’t even owned a pair of shorts for…. I don’t know, a decade? Before kids, I’m pretty sure of that. Anyway, it would appear I still have legs 😛
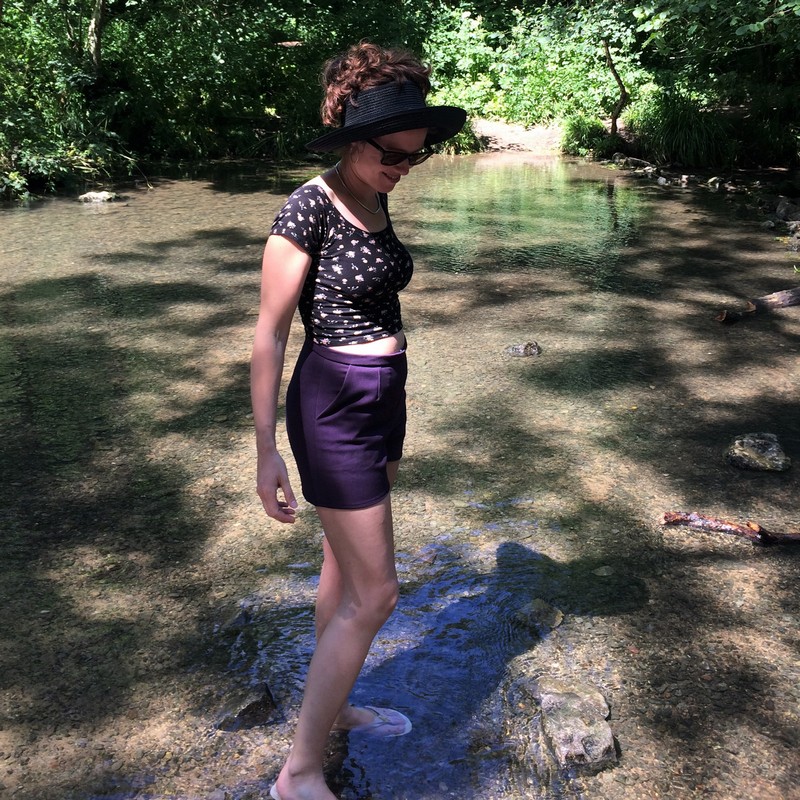
The location shots are at our local river, where it widens into a lovely paddling spot in the woods. It was Andy’s idea to take them there. Thanks, Andy!

In a Nutshell:
A great, vintage-inspired shorts pattern with quality details, but the fit needs a little more work.
Pattern:
The Flared Shorts from Gertie Sews Vintage Casual, which gives instructions for drafting using the Cigarette Pants pattern as a base. Based on my measurements I originally cut a size 8 at the waist, grading down to a size 6 at the hips, but made some adjustments (detailed below) after sewing up a toile.
Fabric:
This is leftover yardage of a deep purple stretch woven from my Sewaholic Cambie Dress, made quite a few years ago. Unfortunately, past-Anna was not terribly helpful at noting down fabric details. I have a vague note in my file saying I thought it might have been a viscose/poly/lycra blend, but I clearly wasn’t sure. I do remember I bought it from Husqvarna Studio in Bath, though, which is probably why I had so much leftover as they’re seriously generous with their cuts!

New skills learnt:
This was the first time I’ve ever made a pair of shorts, and the first time I’ve ever made pockets with a stay (this stops them gaping open at all, and helps keep the tummy section flatter, so all in all a very good thing)
I also learnt how to make thread bars instead of the eyes from the hook and eyes, as I realised the eyes would be visible otherwise, and we can’t be having that now, can we?!
Changes I made:
- I had already made a trial toile for the full-length trousers out of some nasty polyester and realised I needed to add a fair bit of fabric at the hips–especially at the back! My original toile was a size 6, grading up to a size 8 at the waist. I then added 1/4″ to the hips only (grading down to nothing by the waist and mid thigh) on both front and back side seams, but graded up to a total 1/2″ extra at the back (above the crotch) to accommodate my ample rear. Ahem.
Toile #1:
[envira-gallery id=”7653″]
Construction:
First up I had to draft the pattern for the shorts, and although Gertie’s instructions are fairly thorough she neglects to tell you how much to flare out the sides by. I’m guessing that’s because it will be different for different sizes, so I guestimated and went with 1 1/2″ added to the bottom of each side seam, and 1/2″ to the inseams. I think that was a pretty good amount for me, although they might not be quite as flared as the ones in the book.
The construction was reasonably straightforward, although the main fabric was an absolute pain in the backside to press as it really doesn’t want to take a crease. Makes sewing darts much more fiddly! I ended up basting the tops of the darts within the seam allowance after pressing them towards the centre, as they really didn’t want to stay there otherwise.
One thing I did have a problem with was the order for finishing the seam allowances. I can see the virtue in overlocking them after sewing and checking the fit, but it was really fiddly to do so on the finished garment. Next time I will be finishing all seam allowances after cutting, and marking the notches with something different like coloured thread tacks.
The only other problem I encountered while sewing was that the waist was longer on the back than the front. I scratched my head a few minutes, then remembered that the alterations I made would have added extra length to that seam at the back, and that I hadn’t trued the pattern pieces. Ooops! I sewed them together by lining up the bottom, and just chopped the little bit extra off the top.
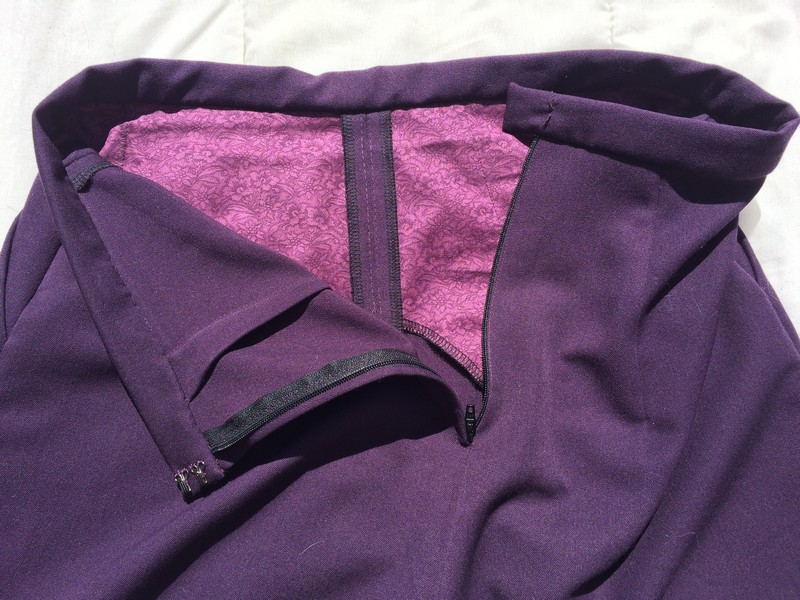
Here’s a peek at some of the construction details. You can see my lovely lining fabric used for the pocket stays, and the couture thread loops I sewed on the waistband. Just ignore the general bumpiness of the waistband. Like I said, this fabric can be a nightmare!
Time taken: 4 hours 50 minutes (not including cutting out)
Not the quickest project to sew, but 1 hour 15 minutes of that time was handsewing the inside of the waistband and the hook and eyes.
Overall verdict:
I have to say, a few fit issues aside, I’m actually really happy with these shorts and have worn them a couple of times already. I’d thought they’d be too short for me to feel comfortable in public, but it turns out I’m fine with the length. Perfect for summer heat, and who knows, I might even wear them over thick tights later in the year.
Things I love about them are the colour–a great dark neutral for me!–and the fact this fabric doesn’t crease easily. They will be perfect for taking on holiday as they’ll come out of the suitcase looking just as good as when they went in 🙂
I also really enjoyed the sewing process (fabric wrangling aside). There was something deeply satisfying about making a pair of non-skirt bottoms, for this habitual skirt and dress wearer. I think if I can get myself a great fitting trouser block then I’ll be making plenty more of them, as trousers are often way more practical than skirts when child-wrangling.
Now, though, let’s have a closer look at the fit issues. There’s a reason you haven’t seen any shots from the back so far!
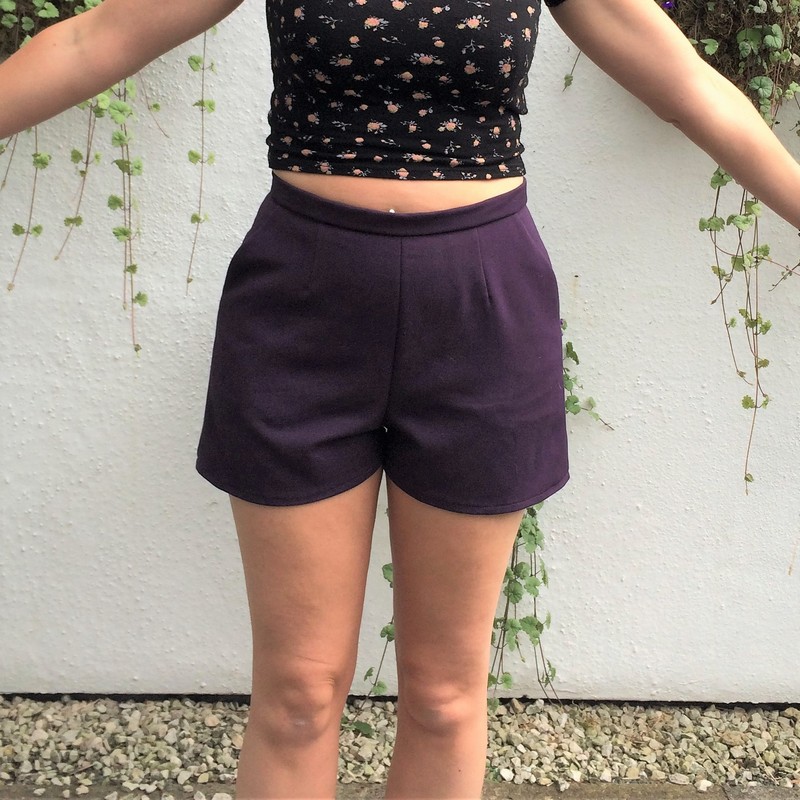
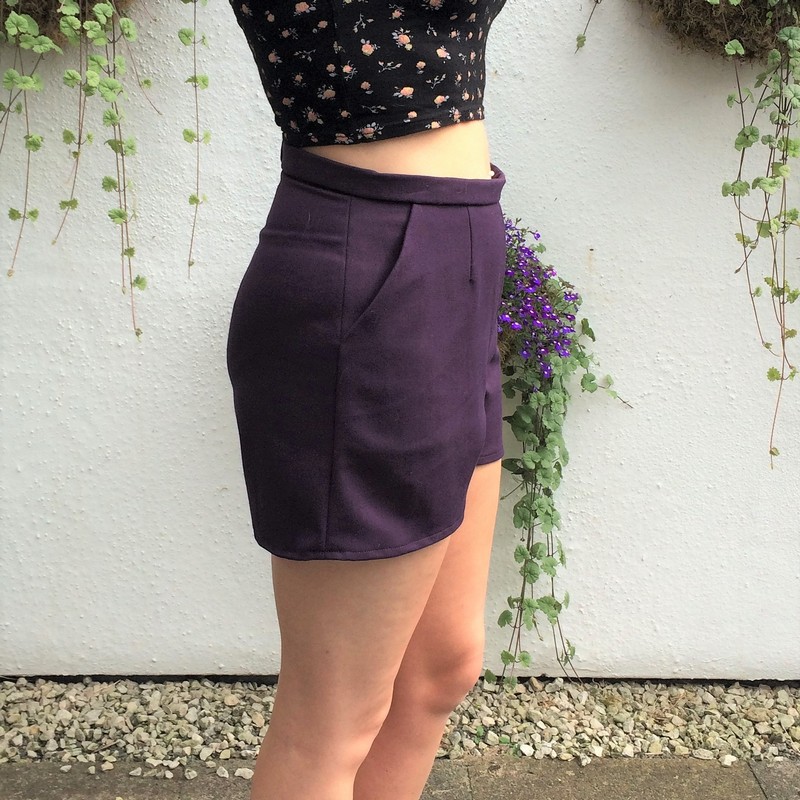
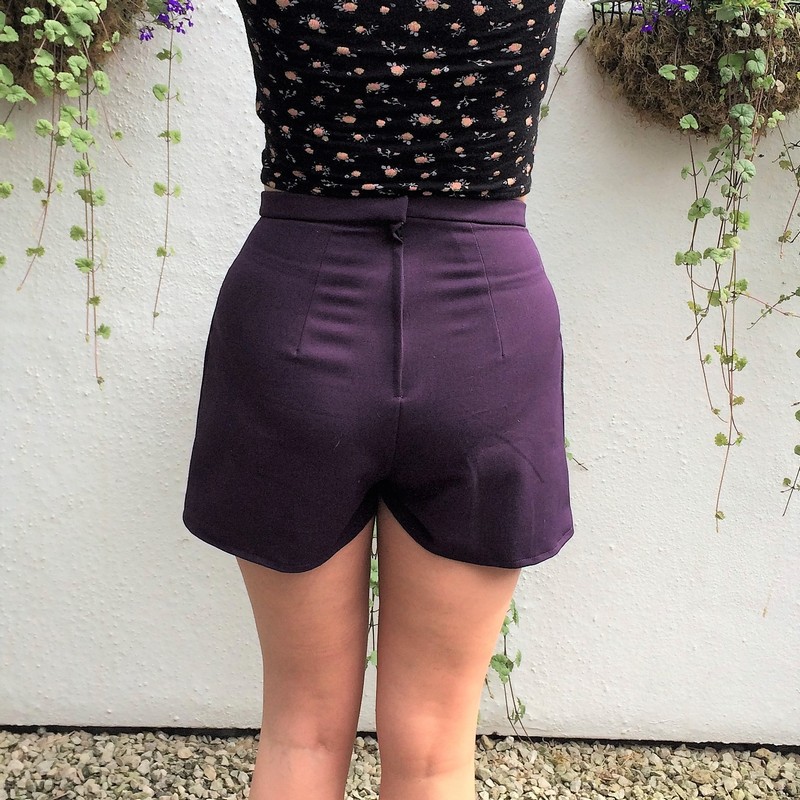
I’m pretty happy with the front, and the side view isn’t too bad. It’s the top of the back that really lets me down. Major pulling between the darts and the zip. Also, the top of the lapped zip isn’t looking too smart. I think that’s being pulled apart a bit too, by the force of my mighty glutes! No, seriously, my bum is a different shape to when I last fitted trousers. Back then I had to make darts longer as the widest part of my behind was much lower. Now it seems to have moved upwards, probably as a result of all the weights I’ve been doing–deadlifts really pay off! Okay, I haven’t done that many workouts recently, but it seems I built up fairly decent glutes last year and they haven’t disappeared just yet 🙂
The other issue at the back is the way it sits much higher there than at the front. I should have noticed this before attaching the waistband and chopped some height off, but I didn’t. Ah well. I’m guessing this is probably a swayback adjustment, as I always seem to need those.
The other thing I’m not all that happy with is the waistband. It just isn’t crisp enough, and I’m thinking now I should have used fusible interfacing after all. So, I could attempt to fix these issues simply by removing the waistband, letting out the back darts a little, chopping the whole of the back waist down so it sits straight, and reattaching the waistband with new interfacing. But… that sounds like a right hassle, because what if the waistband no longer fits? I don’t have enough fabric to make a new one! And all that handstitching…
What I’ll probably do is procrastinate and wear these shorts with a longer top that covers the problem area. Maybe I’ll fix them when I have a spare couple of hours. Or maybe I never will. Who can tell?
Changes for next time:
I’ve already said what I’d change to sort out this particular pair of shorts, but what about the ongoing refinements to my cigarette pants pattern? Well, here goes:
I’ve already gone and made some alterations to the back pattern piece for the cigarette pants, changing the crotch seam to the size 8 all the way to give a little extra length there. I also found that I’d somehow fluffed up the tracing and was missing about 5mm from the waist at the side seam, so that might partially account for some of that pulling at the back. Next time I sew up this pattern (which will probably be a pedal pusher version in indigo stretch denim) I will sew the back darts after the side seams, and pin fit them to get the fit perfect across the back.
I know I also need to reduce the height at the back waistline, but I’m planning to figure this one out as I fit the next version, using elastic on my body to mark the line it needs to be cut to. I’ll then transfer that to the pattern sheet. Note to self: I need to true the side seams before I sew this again too!
Costing:
Pattern: £1.75
Based on the book of ten patterns being £17.49, so £1.75 a pattern.
Fabric: £0.00
The main fabric was leftover from another project (from so long ago I can’t remember how much it cost anyway) so I’m calling it free, and the pocket lining was quilting cotton gifted to me by a friend.
Notions: £0.00
Zip and hook and eyes from stash.
Total cost: £1.75
Can’t argue with that! Who says making your own clothes can’t be done on a budget?!
And finally, for laughs:
So, are you a fan of shorts, and if so, what length do you go for?
Disclaimer: some of the products linked above use affiliate links, meaning if you follow the link and make a purchase I will receive a small referral fee (at no added cost to you). Any extra income to help fund my sewing habit is greatly appreciated, but rest assured I only recommend products I love and think you might find useful too 🙂
It looks great and it’s such a beautiful combination with the cropped top.
Thank you! I was pleased they worked so well together 🙂